Image Map

Sunday, March 18, 2012

St. Patrick's Day Cookie Tutorial

I hope everyone had a wonderful weekend!  Here are some St.Patrick's Day cookies I made for the holiday.  Simple, yet effective ;-)


Hint:  You only need one color and one consistency for these cookies.  I use 20 second icing.  I outline the cookies, let them dry for a few hours and then paint them with "old gold" luster dust.  I mix my luster dust with a "little bit" of vodka.  I give it two or 3 coats to get the look I want.  Just remember to let each coat dry before painting the next one.

Then I flood my cookies with the same 20 second icing.

To get the pretty green color, I used Americolor "Leaf Green" with a touch of "Sky Blue".  Sugarbelle has a now famous tutorial for obtaining the perfect consistency for icing your cookies. I posted her video below.  Her tutorials are very helpful.  I follow her blog and facebook page on a daily basis!


Saturday, December 17, 2011

Tile Coasters

Hello everyone! I hope this post finds everyone happy and healthy!  Lately, I have been exploring other forms of medium to express my art.  I am not certain how it came about, but all of a sudden I want to paint and sculpt and design......  I am thrilled that I am inspired!  Here are some pics of the tile coasters that I have been making - hopefully you will also feel some inspiration to go create!


Thank you for looking!

Best wishes always,
Dana

Sunday, November 13, 2011

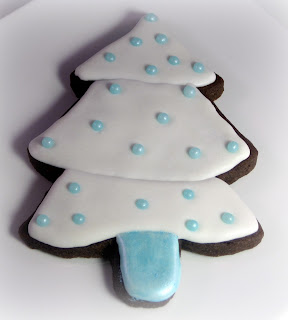
New Holiday Cookies!

Hello everyone - I hope this post finds you all happy and healthy!  I have been very busy with my new Etsy store and have not been able to blog as much as I would like.  I am making a pre-New Year resolution to put aside time every week for a new post ;-)

In the interim, I would like to show you some new Holiday cookies I have created.  I hope you like them.


Thank you so much for looking!  I will be back this week with a tutorial!
Best wishes,
Dana

Wednesday, September 7, 2011

Toba Garrett Inspired Brush Embroidery Cookies

Hello!  I hope everyone is well and enjoyed the long Labor Day weekend!  I have been very busy - trying to get my new Etsy Store up and running as soon as possible. I hope to be open within the next two weeks. I will keep you posted.  In the interim, I would love to show you my new logo ;-)


I recently made more brushed embroidery cookies.  I think you will see a major difference from those in my last post.  Of course, I am going to tell you how I achieved a better result.  The following pics are of the new cookies, inspired by Toba Garrett.


The design is based on Toba Garrett's Victorian Brushed Embroidery cookie from her book Creative Cookies, which I sell in my amazon store.  Her piping work is so delicate and elegant.  The book explains, in detail, all the steps needed to make a gorgeous cookie.  She also includes various patterns, which I found to be extremely helpful.

Now - on to my secret tool that I used to get the very fine, detailed results.  Look closely, not TOO closely ;-),  at the piped stamen.  When I piped them, they actually came out perfectly round, no points to pat down.  At first I thought it was a fluke, but it continued to happen.  How???  Drum roll please..... PME tips.  They are magic - it is as if they will not allow you to make a mistake.  I have never had such a stress free time piping.  In fact, I would go as far as saying, it was a joyful experience!  The results of the branches this time around were also far superior to those I made in my last post.

I used a #1 PME tip for the new cookies pictured above.  I used a #1 Wilton tip for the cookies from the last post.  Vivre la diffĂ©rence!

I purchased my tips from Karen's Cookies.  They were not that easy to find and I knew from her reputation that she was a trusted source.  She has exceptional customer service to boot!.


I encourage you to go to her web site, as it is a treasure trove of supplies and free tutorials!

As always, I hope you found this information helpful and truly enjoy connecting with you!

Be well!
Dana

Monday, August 22, 2011

Halloween Cookies - Brush Embroidery Tutorial

There are certain things in life, I just do not want to take part of....jogging is one and piping with royal icing is another ;-)  I did, however, want to try and make some elegant Halloween cookies.  I had a master plan and I was going to get on the B.E. bandwagon.  These are the cookies that were the product of that plan.


I spent many hours studying others' work.  The pressure was on, as my predecessors had made stunning cookies using the brush embroidery technique.  Everyone has a different style and various approaches to their work.  I basically gleaned bits and pieces of everyone's tips, tutorials and art to get my results.  I am definitely going to try other methods and will keep you posted on the results that I get with each.

In the interim, I am posting three videos from different sources that show varying methods of brush embroidery.  The first is by Elaine MacGregor.  This is a more traditional approach and the results are exquisite.


The next tutorial is from a Wilton instructor (I apologize, but they did not state her name), using the Wilton Method.


The third video was produced more recently by an exceptional decorator, Ali, from Ali Bee's Bake Shop.  Not only is Ali talented, but she's got "heart"!  She and her family just relocated to Joplin, MO! I encourage you to go to her Facebook page and let her know how much we appreciate her tutorial!


So that, my dear friends is my post on brush embroidery.  As always, if you have any questions, tips, comments or pics to share, please let me know.  I will be happy to post the information.

Be well!
Dana

Tuesday, August 16, 2011

Picnik - Before and After Pictures of My Work

Everyone loves a "before and after" picture - right?  I had such an enormous response from my last posting of the results I get with Picnik; that I could not resist to show you some "before and after" pictures of my work.

I feel as if I am showing you pictures of myself without make-up on! I have decided that helping you with the quality of your pictures trumps my vanity ;-).  Here it goes....


If you have any questions, please feel free to ask!
Have a great day!
Dana

Sunday, August 14, 2011

Picnik - a FREE online-photo editing tool

I found a treasure!  Perhaps I was not the first to discover it, but now that I have, I wanted to run and blog about it.

I am forever trying to take better photographs of my work.  I read and read on how to take a better photo and have had only a modicum of improvement.  It seems as if everyone else is mutli-talented.  Their art is gorgeous in and of itself, then the photo they post is perfect too!  How do they do it?  Well, I do not have all the answers, but I did find a decent solution for myself, until I get better equipment.

Picnik is an on-line photo editing tool that is genius!  Apparently, it is on par with Photoshop and very user friendly.  The basic program is FREE.  You can also upgrade to a premium membership for more advanced effects, like airbrushing.  As soon as I am able to upgrade, I WILL be airbrushing every photograph of myself that has ever been taken since the age of 10! ;-)  In the interim, I am very pleased with the results that I am able to achieve, for my cakes and cookies, with the free membership.

This is a photograph of a Halloween Cupcake I made last year.  I used a very expensive backdrop at the time the photo was taken - a white paper towel.


Not very impressive.... The next photograph is after I used Picnik.  I took the exact same photo, cropped it, used "auto-fix" to adjust the color and added a "vignette" background.

 Major improvement!!  For a second look, also using Picnik, I took the initial photo, cropped it, used "auto-fix" and then gave it a "matte" finish.

I am totally diggin' the look!


You can use Picnik with your Facebook, Flickr, Picasa Web Albums and more!  I hope I was able to give you some useful information.  As always, I would love to hear your feedback.  Please feel free to send me your "before and after" photos using Picnik and I will be happy to post them.

Have a wonderful day!
Dana